Mr. Johnson's Art
MOVIE POSTER MADNESS WITH INDESIGN & PHOTOSHOP
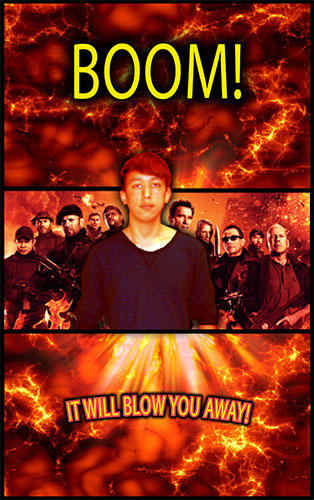
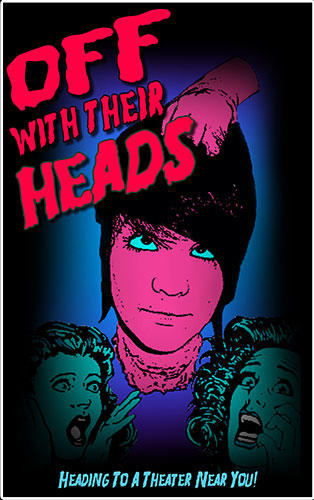
Use InDesign and Photoshop to create a Movie Poster, starring YOU!
Here’s some samples from last year…

Step #1
There are 3 things your poster must have – A Title, A Tagline (a short saying about the movie),
and a picture of you (involved in some way) in at least HALF of the poster!
Not you just standing there – or cutting your head off and put on another body.
Be creative!
IMPORTANT: YOU MUST SAVE BOTH YOUR PHOTOSHOP FILE
AND YOUR INDESIGN FILE IN ORDER TO PRINT YOUR POSTERS!
MAKE SURE YOU KEEP BOTH FILES IN GOOGLE DRIVE.
Just like with the magazine project.
There are 2 parts to this project:
Part 1: Design your background graphic using the tools you know in Photoshop.
If you need to do something or an effect you don’t know how to do,
look for a tutorial on the Internet to help you.
Part 2: PLACE your Photoshop graphic into InDesign
and design the Text on a NEW LAYER on top of the graphic.
How to do these steps is listed below.
There are a bunch of different styles (or genres) of movie poster to think about.
Here is a list of some different kinds.
Don’t just use the first thing to pop into your head!
Movie Poster Genres:
50s Sci Fi
Action
Animation
Comedy
Horror
Musicals
Romance
Detective
Mystery
Sports
Western
Fantasy
Google some of the poster styles before coming up with an idea for your poster.
Pay attention to the lettering style, pictures, and taglines of the films.
Step #2
Research your poster with Google and Draw out a rough sketch.
Take a look at the different genres of posters from the list above.
When you find something that you think might be interesting for you, it’s time to sketch some ideas!
Ask me for a regular size 11 x 17 piece of paper. With a pencil, begin your sketch.
Here are some examples of some sketches others have done in the past.


PLEASE DON”T COPY ANY OF THESE!
Be Original.
There are so many ideas out there!
Once I approve that your poster is school appropriate
and have suggested some changes or ideas, move on to step 3!
Step #3
The Photoshop Part.
Find and Save your graphics!
Once you have figured out how YOU are going to be involved in your poster
(remember, you can be GIANT against something SMALL, or something SMALL against something LARGE)
you will need to find the images you will use.
Make sure they are at least 2000 pixels wide so they will not be too small.
Save them to GOOGLE DRIVE.
Next, figure out how you will be part of the picture.
If you are in an action pose and part of another graphic,
you will need to borrow my camera, or use your phone (save it to GOOGLE DRIVE)
and have someone take a picture of you posed the way you need to be
so you can cut yourself out in Photoshop and put yourself in the other picture later!
When you have the graphics you need,
it’s time to make your canvas in Photoshop!
Open Photoshop and make a new canvas.
Make the canvas 10 inches wide by 16 inches high at 150 resolution.
If you can’t remember how to do this, or haven’t done it before,
ask someone nearby or ask me to help.
THIS NEXT PART IS IMPORTANT!
Download all your graphics to the desktop.
DO NOT JUST DRAG THEM INTO PHOTOSHOP!
Use the CONTROL BUTTON and click on the graphic.
Choose OPEN WITH then PHOTOSHOP.
Step #4
When all your graphics are open, SELECT > ALL (or COMMAND +A) on one of them
(probably the background image first).
COPY the Image (COMMAND + C).
Go to your canvas and EDIT > PASTE (or COMMAND + V) onto your canvas.
Do this for each graphic and you will have a new layer in your poster for each one in Photoshop.
Don’t forget to add the photo of you that you will be putting in later.
Remember, we can adjust the size of the graphics
when we need to as we use them.
Step #5
Using Photoshop
Some TOOLS that will be useful in putting together your graphics are:
The Polygonal Lasso Tool
Use this to CLICK and DRAG, Click and Drag, Click and Drag around your image
to copy it and paste it into another graphic.
The Eraser Tool
Use this to ERASE stuff you don’t want!
Remember, you can RESIZE the ERASER, or ANY TOOL, by using the bracket keys ( [ and ] )!
DON’T FORGET:
Use the MOVE TOOL to move graphics.
COMMAND + T will allow you to resize and rotate graphics.
Always hold the SHIFT KEY and PULL FROM THE CORNER
to keep perspective.
If you want a background color, use the PAINT BUCKET or GRADIENT TOOL
and put color in the background.
You can get a color from a graphic
by holding the OPTION KEY and Using the EYE DROPPER TOOL.
IF YOU NEED HELP
I am here to help you.
BUT, I would like you to try putting some things together on your own.
Remember, you will have the original graphics still in GOOGLE DRIVE
in case something goes wrong (which it never does, of course!)
If something weird or bad happens, STOP right away and call me.
Have me come over and check your graphic before you are “DONE”.
I might have some suggestions, like using FEATHERING to blend some graphics…
When I have decided you are done, you can move on!
Remember, when you save Photoshop files, you must have the .PSD at the end of the file names
or you won’t be able to open them the next day!
Step #6
Using InDesign
So, your graphic is done and you are ready
to PLACE it into InDesign to add your text. Here’s how to do it…
Open InDesign!
Create a NEW DOCUMENT!
Instead of LETTER, Choose TABLOID.
Make sure your Photoshop Graphic is saved to your Desktop.
Select FILE > PLACE and choose your Photoshop file from the Desktop.
Click in the upper left corner of your InDesign file, where the two pink lines meet.
(The graphic is going to look “fuzzy” because it is only a representation of the graphic,
not the actual graphic itself!)
Look for the LAYERS palette on the right side of the screen.
Click on it, and add a NEW LAYER by clicking the icon next to the Trash Can.
Lock the layer with your Photoshop file on it (the BLUE layer).
Click on the RED layer and add your text.
Begin adding your text, like in the Song Lyric Assignment.
Try the OBJECT > EFFECTS menu and look at Drop Shadow, Bevel and Emboss,
and some of the other choices for your text.
Also, look for the STROKE Palette and add an OUTLINE to your text if you want!
Save both your Photoshop and InDesign files to GOOGLE DRIVE!
Again, Save both your Photoshop and InDesign files to GOOGLE DRIVE!
You will need both of those to print your poster!
When complete, export your Movie Poster as a PDF file.
Go to InDesign – FILE > EXPORT.
Choose DESKTOP. Then SAVE.
On the next screen, just click OK.
Keep clicking OK until it creates the file!
From your program, go to FILE>SAVE AS and choose DESKTOP,
then drag from the DESKTOP to GOOGLE DRIVE and the Correct Class Folder.
Save your final files in Google Classroom.
Just add the files from Google Drive.
Make sure you save all three PHOTOSHOP, INDESIGN, and PDF files!
When you think you are done, let me take a look, then you can submit it.
I will print it for you after I have graded it!
This site provides information using PDF, visit this link to download the Adobe Acrobat Reader DC software.