Mr. Johnson's Art
CREATE A PLANET IN PHOTOSHOP
In this lesson, you will create your very own planet with Photoshop
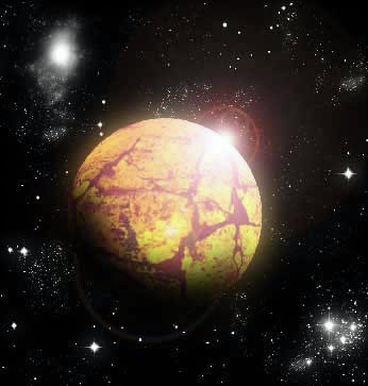
Here’s some samples from previous years!


STEP #1
Create a NEW DOCUMENT in PhotoShop.
Open PhotoShop & choose FILE >NEW or hit Command (⌘) + N.
Make your canvas 8.5 x 11 inches and 150 Resolution. (See Below).
Click OK.

STEP #2
Hold the SHIFT KEY down and draw a circle using the Elliptical Marquee Tool.
Draw it approximately in the center of the canvas and fairly large.

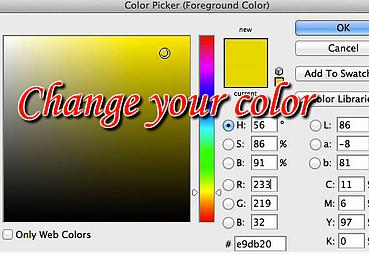
Change the color for your planet! Click the Set Foreground Color square.

Slide the little circle around and click OK when you find one you like.
Choose the Paint Bucket Tool. It might be hiding behind the Gradient Tool.

Move the Paint Bucket over the circle and click the mouse button.
It should fill with your color.

STEP #3
Surface Cracks
Use Google to search for a Cracked Texture,
click CONTROL and choose COPY IMAGE.

Go back to Photoshop and select EDIT > PASTE to create a new layer with your texture over your circle.
Hit COMMAND + T to Transform and stretch the texture to cover your circle.
Click RETURN to set the new size.
Make sure you have a Background layer that is Black.
If not, ask Mr. Johnson to help you create one.

STEP #4
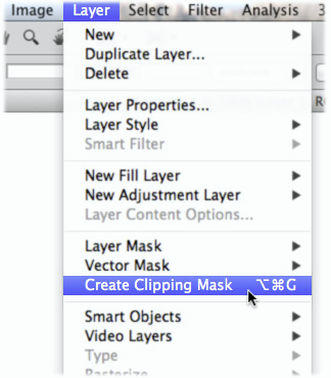
Clipping Mask
Go to: Layer > Create Clipping Mask …
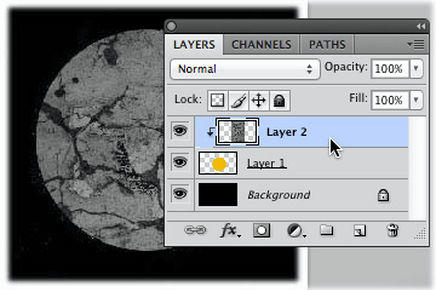
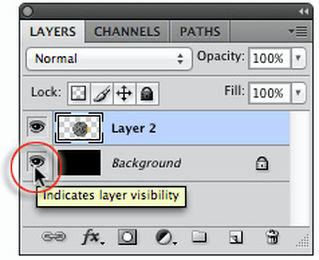
Turn the Background Layer visibility off by clicking the

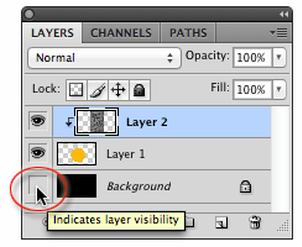
… and then go to: Layer > Merge Visible ……or hit the keyboard shortcut:
Command + Shift + E and merge the visible layers.
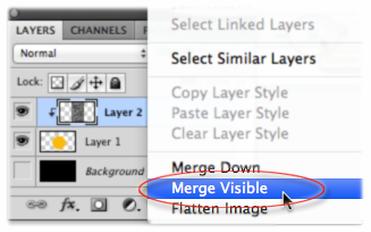
Turn the visibility of the Background Layer back on!
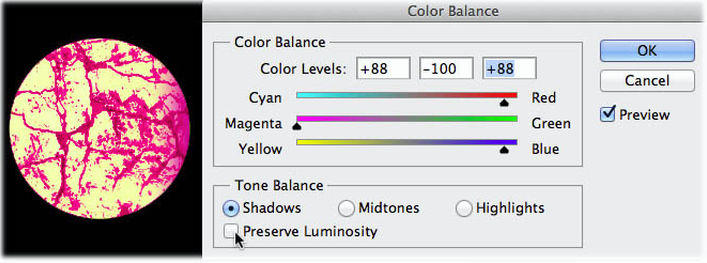
STEP #5
Colors
Go to: Image > Adjustments > Color Balance or hit the keyboard shortcut: Command + B,
and adjust the highlights to whatever you like … then click OK.
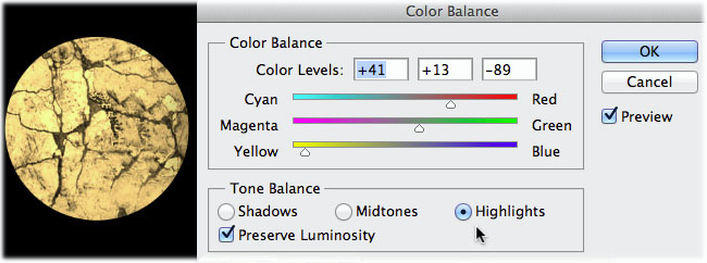
Do it again! Hit the keyboard shortcut: Command +B and apply Shadows and Midtones.
Do it several different times –Experiment!
STEP #6
Filters
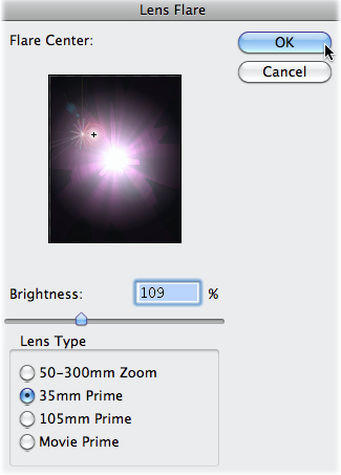
Go to: Filter > Render > Lens Flare.
Choose 35mm Prime.
Set Brightness to whatever looks good in the Preview window.
Click OK when you have what you want.
COMMAND + J on the Planet Layer and Duplicate it.
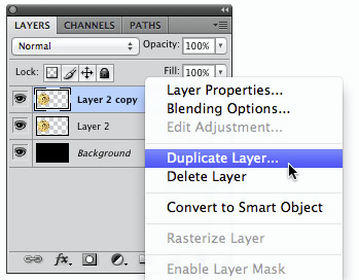
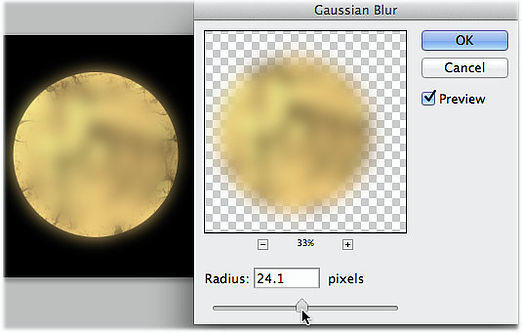
Stay on the new layer and go to: Filter > Blur > Gaussian Blur and make it really fuzzy … (about 25 pixels).
Then drag the fuzzy layer beneath the planet layer …

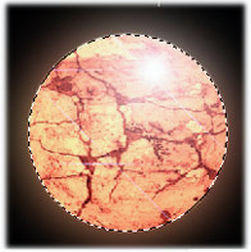
Should look something like this now (with a slight fuzzy glow around the outside):

STEP #7
More Filters
Select the top layer …
… and holding COMMAND, click the Layer Thumbnail (the small square with the picture) of the top layer:

That selects everything on that layer.
Create a New Layer
(Go to LAYER > NEW > LAYER or click the little icon next to the Small Trash Can.)
Select a Paint Brush, and make it a Soft Fuzzy Brush Tool, and create the planet’s shadow.
Hit COMMAND + D to deselect when you are done.
find a cool Star Field Background, view image, CONTROL + COPY IMAGE, and EDIT > PASTE.
Drag the Star Field to to bottom of the Layer Stack.
Lastly, go to the Star Field Layer and apply Filter > Render > Lens Flare,
in a way that the highlight could be seen behind the planet.
You might have to try a few times to get this right.
From your program, go to FILE>SAVE AS and choose DESKTOP,
then drag from the DESKTOP to GOOGLE DRIVE and the Correct Class Folder.
Save your final file in Google Classroom.
Just add the file from Google Drive.
This site provides information using PDF, visit this link to download the Adobe Acrobat Reader DC software.